Our home renovation is going s l o w l yyyyy, but who can blame us? We have a 5 month old infant and a toddler who’s as energetic as ever. There’s literally no time in the day for any type of extracurricular activities whatsoever. Kids and work take up 99.9% of our time.
Outside, we have contractors working to basically give our exterior a brand new facelift. I smell roof decks in the near future (yay!!!). Inside, we are renovating room by room to transform each one into dream spaces. So the fact that our dining room makeover is complete is a huge accomplishment. Here’s the rhyme and reason behind one of the diy projects in our dining room.
Because I’m tea obsessed, I have LOTS and LOTS of teas / tea accessories that have never had a decent home. They’ve been scattered and unfairly stored away in all kinds of spaces. I’ve always told my husband that my dream dining area would have a Tea Space so it was just a matter of time until that happened.
Vision for the Tea Space:
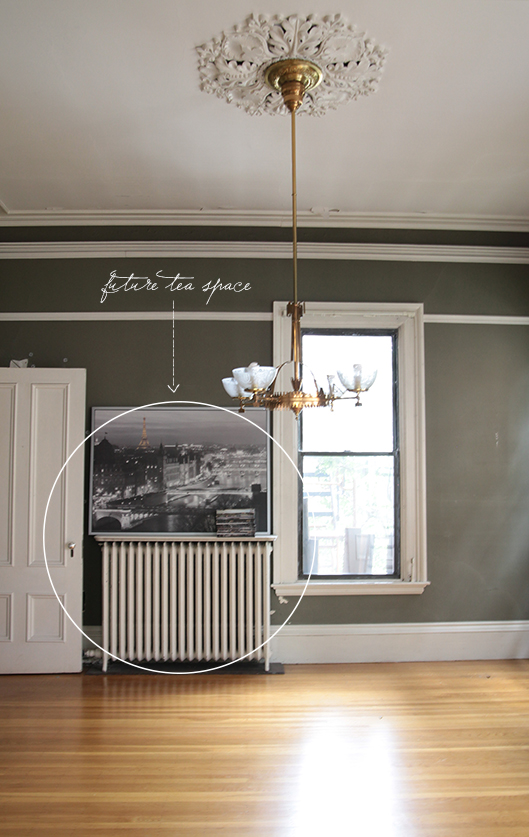 We decided that the wall space above the radiator was the perfect place. Because our ceilings are decently high it was a no-brainer- we needed to maximize the vertical space. What we were missing was something to display the teas. Multiple hanging shelves maybe? Or a kitchen cabinet perhaps? Those ideas went out the window when we saw a hutch at the thrift store.
It was my husband’s vision. In a million years, I would’ve never imagined it. He spotted the hutch and immediately thought we can utilize the top portion. He convinced me that it was Restoration Hardware-ish. It was tough for me to envision. I mean, the hutch was not the prettiest thing I’ve seen. And I like pretty. Clean pretty. This thing was a mess- totally beat up.
 Good thing I trusted the hubs! After all, this was MY Tea Space and it had to be perfect. He sanded and painted the hutch and it was unrecognizable. Afterwards, I added my personal touch- displaying all the ‘junk’ as he heartlessly labeled them.
Nothing went to waste…we used the bottom piece for another project (to be revealed in another home makeover post). Total cost? 40 bucks + paint cost.
 Here’s the space completed! With a little imagination, you can definitely repurpose almost anything into a functional dream piece. It doesn’t have to be expensive AT ALL. Isn’t that the beauty of it?
I use this hutch for 95% of my tea related items including teas that I’ve snatched up in Paris from our last trip. Here’s the nitty-gritty:
 Andddddd more images to feast your eyes:
 Can you tell I’m a little Teavana-crazy?! And believe it or not, this is not enough space for all my tea stuff. The rest will have to be stored away. Sighhhhh.
UPDATE: Please click HERE to see what we did with the bottom half of the hutch. You won’t believe your eyes!
Also, in case you’ve missed it, here’s another inexpensive makeover (using a thrifted vintage sewing machine): Desk Makeover for my little office area in the bedroom.
Andddd…here’s what’s happening on Instagram lately: work is tough!, Zoey is such a sleeping beauty, our dining room finally has a decent table (from Restoration Hardware). To follow along my life’s daily tidbits, please click HERE.

Enjoy your Sunday!


Love this idea especially since I will be moving into a place with the same radiators. What did you use on top of your radiator to be able to utilize it as a counter top?
LikeLike
I am curious do you have pictures of where you tea hutch landed. You showed a picture of a beautiful olive green room with white trim and wooden floors and your vision of future tea space . Did it make it into that charming space because it would be just absolutely lovely!
LikeLike
Hi Maria!
Yes, if you keep scrolling down the post, you should see the pictures of the tea cabinet above the radiator.
Have a great day!
Kellie
LikeLike
I love tea!!! Makes me want to do something like this….ah obsessed!!!
LikeLike
Reblogged this on paigeofeverything and commented:
SO CUTE!!!!
LikeLike
It is amazing!
LikeLike
It’s so pretty! This totally feeds my tea addiction.
LikeLike
This is really pretty!
LikeLike
I absolutely adore the idea of a tea spot, your home is beautiful!
xo
styleontheside.com
LikeLike
Fabulous post and i feel very cool after reading your all post and high quality pics you are using to describe in details, i really enjoy with your post 🙂
LikeLike
I only discovered recently I like tea, I don’t have a whole space for my pretty pot but you can see pictures of my tea ritual right here:
http://66.147.244.55/~coralynx/tea-for-one-please/
Your little corner looks great Kel!
LikeLike
Love this! Beautiful! Do you have a trick for getting the sparkling water down?
LikeLike
I am a HUGE tea fan (I don’t drink coffee) so I adore this idea! Thank you for the beautiful inspiration!
LikeLike
Fantastic! Well done, absolutely amazing. Love it to bits! Can’t wait to see more of your fabulous home…! Enjoy! x
LikeLike
Beautiful! You guys are so crafty.
LikeLike
So pretty! We have been doing the same thing with our furniture. So far, we have completed bedside cabinets – the table it next! I love giving old furniture a new look!
LikeLike
Waaah that is beautiful. ^^ I love those white mugs with gold lettering. I hope I can find one like that too or just do a DIY maybe.
LikeLike
Ah it’s amazing, I too am a typical tea obsessed Brit! xo
LikeLike
I love this, it looks gorgeous! I too am completely tea obsessed and this post has been such an inspiration for storage and decoration ideas!
LikeLike
So precious!
LikeLike
Inspiring and very pretty! I have my little own tea space in one shelf on top of the kitchen sink 🙂
LikeLike
Unbelievable! What a great transformation and perfect use of the space.
LikeLike
Gorgeous! Congratulations. I love the white; it really makes all your treasures stand out. I need to something like this some day….
LikeLike